


Multiple mounting options

Customizable size and shape

30% higher efficacy (lm/W)
Key Features

Multi-panel tiling for larger spaces

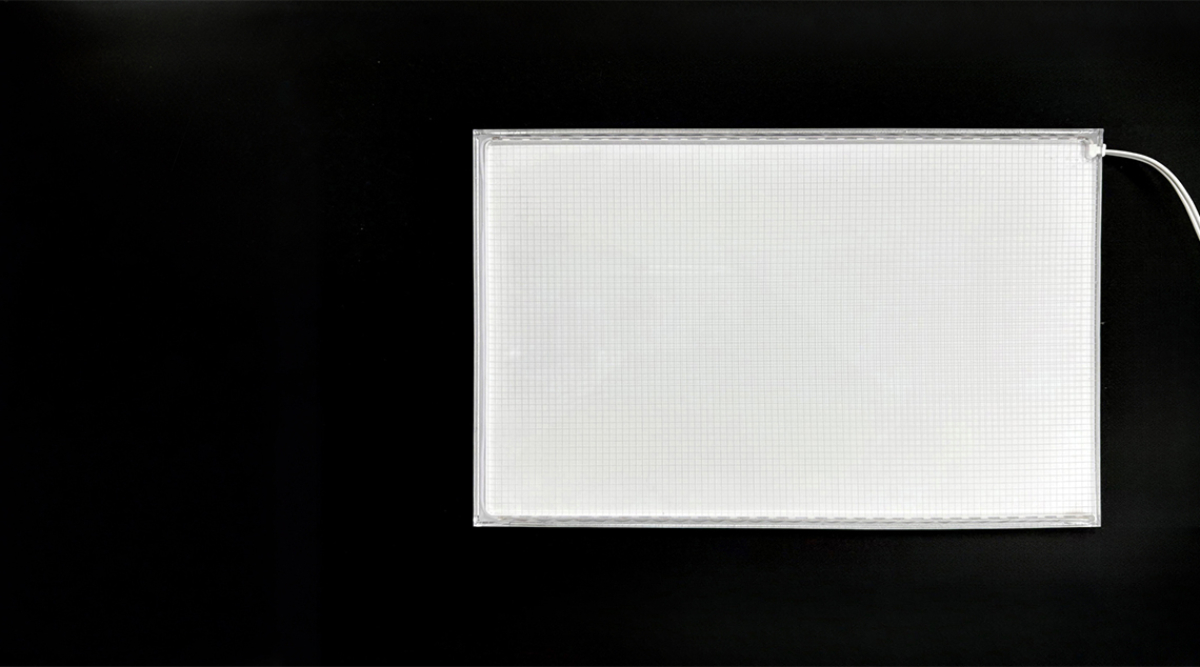
6mm thin with fully customizable size

Increased lifespan of alternative lighting

No LED spots
5 year warranty

UL listed
Applications
The LED panel is designed for many uses with a wide variety of applications that it can be used for, the following include recommended options:
 Backlighting
- Feature Walls
- Ceilings
- Shelving
- Backlit Stone
- Backlit graphics
Custom Sizes:
Once the panel is connected to output and power supplied to the input Lorem ipsum....
Technical Specifications
Performance Specs
| CRI | 95+ |
| Color Temperature | 2700K, 3500K, 5300K |
| Surface Brightness | ~6,500 Lux |
| Efficacy | 100ml/W |
| Illumination | Single face |
| Operating Temperature | -30°C (-22°F) to +40°C (+104°F) |
| IR Rating | IP22 |
| Environment | Dry/Damp Location |
| UL/ETL | UL Listed |
| Warranty | 5 years |
Mechanical Specs
| Thickness | 8mm, 20mm with diffuser |
| Maximum Size | 95” x 47.5” (2,413mm x 1206.5mm) |
| Minimum Size | 5“x5” (127mm x 127mm) |
| Mounting Options | Pre-drilled holes, Z-Clips, Standoffs |
Electrical Specs
| Input Voltage | 24V DC |
| Power Consumption | 4.4 W/ft |
| Wire Size | 20 AWG, 2 Wire |
| Wiring Options | Must be wired to power supply/in parallel (max wire length: 20ft/6m) |
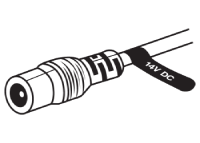
| Connector Options | Type A 5.5/2.1mm barrel plug 5’ (1.5m) or 10’ (3m) wire with bare lead |
Notes
Please use only the UL Listed or recognized power adapters with this product. Choose a power supply that meets the load requirements of the LED lighting connected to the output of the device.
Safety
Identify your system components, including the power adapter, and optional dimmer and controller. Ensure that you use only UL certified power adapters with an output voltage that matches your input voltage. Never apply 24V DC to 12V DC panels, as this can cause burned-out LEDs or even a fire within seconds. Check the voltage labels at the end of the power cord.
Customization
Wire exit Loctaions
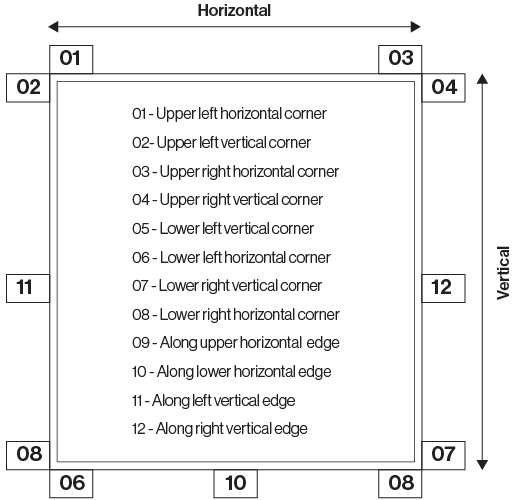
Exit Type Options

1 - Edge
Power cord exits from edges

2 - Notched
Recessed (notched) power cord exits

3 - Rear
Power cord edits from the rear side of the light pane
Wiring Options
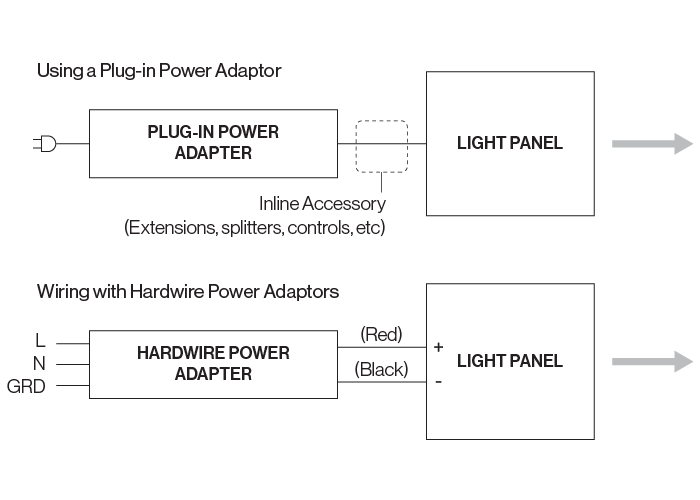
Use a plug-in adaptor to connect the Light Guided Panel to your power source via DC Jack.
- Turn off power to your system at the main breaker.
- Install your system components. Refer to wiring guidelines for each component to build your system.
- Check connections and turn on power at the main breaker.